

What a car leather sealant protects and what it doesn't
Daniel von Detailing1 |


Koch-Chemie
Backing Plate "Soft" with Extra-Soft Foam Cushion
Koch-Chemie
Koch-Chemie
Microfibre Polishing Pad for Glass Surfaces (Sealant Prep)
Koch-Chemie
Heavy Cut "Long" Wool Pad Lambskin Polishing Pad "Rot" (Long Pile)
Koch-Chemie
Pad Dispenser dispenser for polishing pads up to 150mm
The Koch-Chemie polishing products range brings together paint cleaning and decontamination, cutting and finishing polishes, matched pads and panel wipes for the complete paint correction process. The aim is the least aggressive effective combination: enough to reduce the defect in a controlled way and leave a clean finish, without chasing maximum paint removal.
The Koch-Chemie polishing products range runs from clay bars and lubricants through Heavy Cut, Fine Cut, Micro Cut and One Cut to the 2024 pads, degreasers and products for specific materials. A simple product list would miss those differences. This guide follows the job itself: prepare the surface, assess the paint, work a test spot, choose polish and pad as a pair, inspect the result and factor in the protection that suits the process.
A tip for the job: A manageable test spot helps you dial in the polish, pad and machine for the paint. Start with a sensible mild combination and increase the cut only when the defect, paint condition and measurements justify it. Compare the result under the same inspection light before using that combination across the whole panel.
The Koch-Chemie PolishSystem pairs matched polishes and pads across different correction and finishing stages. Results also depend on the machine, technique and paint condition. A cut level describes the intended correction range, not a guaranteed result on every paint. Paint hardness, defect depth, pad condition, machine movement and temperature all affect the correction and gloss you actually achieve.
Heavy Cut sits at the aggressive end. Koch-Chemie rates Koch-Chemie Heavy Cut "H9.02" at 9.0 for cut and 6.0 for gloss, with removal of sanding marks down to P1200. The manufacturer recommends a rotary with lambswool for P1200 to P2500 marks, or a Heavy Cut Pad for P1500 to P3000, both at medium speed and pressure. These are product specifications, not blanket approval for every paint finish.
The manufacturer lists Koch-Chemie Micro Cut "M3.02" or Koch-Chemie Micro Cut & Finish "P3.01" as the next stage. Alongside the finish, your choice needs to account for the protection that follows: M3.02 is silicone-oil-free, while P3.01 already contains protective components.
Fine Cut covers medium correction, with products such as Koch-Chemie Fine Cut "F6.01". It makes sense when Heavy Cut would remove more paint than needed, while a finishing polish would not correct the defect enough. Depending on the defects, it can serve as the main stage or sit between heavy correction and Micro Cut. The test spot shows whether a separate finishing pass is still needed.
One product review on Trusted Shops describes F6.01 as easy to work with and praises its glossy finish on moderate defects. That individual customer experience cannot replace a test on your own paint, but it adds a specific account of using the product to the technical picture.
Micro Cut targets fine polishing marks, holograms and high gloss. M3.02 is a core silicone-oil-free option; P3.01 combines a micro-abrasive polish with carnauba wax and non-volatile silicones; Koch-Chemie Micro Cut "M2.02" is the finer stage for suitably prepared surfaces. One Cut combines correction and finishing when the defects and your efficiency targets allow a single-stage process.
The Koch-Chemie polishes collection goes deeper into choosing the polish itself. This overview starts earlier and finishes later, taking in decontamination, pads, inspection and material-specific cases too. Find the full brand range under Koch-Chemie.
A thorough wash removes loose dirt before polishing. Then check whether bonded contamination needs further chemical or mechanical cleaning. Running your hand over the paint through a thin, clean bag reveals any remaining roughness. Bonded particles can contaminate a pad and leave fresh marks as the machine runs. Remove them with a method suited to the material; add clay and a suitable lubricant only where needed.
The Koch-Chemie clay bars collection explains mild and more abrasive clay, Koch-Chemie Clay Scrubber and Koch-Chemie Clay Pad. Plenty of suitable lubrication is key. Claying dry can leave marks, and extra pressure does not improve pickup. After decontamination, wash again or clean away all residue, then dry the surface completely.
Under bright, directional light, assess swirls, the fine scratches left by washing, separately from holograms, oxidation, deep scratches and overspray. A fingernail test is no substitute for a measuring instrument. You cannot safely polish away deep defects that cut through the clear coat or colour coat. Where possible, use a suitable paint thickness gauge at several points on each panel. Take extra care around edges, creases and repaired areas.
Mask unpainted plastics, sensitive rubber, sharp edges and gaps. Divide large panels into working sections. Have clean pads, microfibre towels and inspection spray ready before the machine starts. Hunting for a towel halfway through polishing leaves product on the surface longer than planned and makes temperature and working time harder to control.
Finally, check that the surface really is automotive paint. PMMA headlights, made from polymethyl methacrylate, also known as acrylic, and metal surfaces need their own products and have their own limits. Similar looks do not turn a paint polish into a universal tool for every material.
A test spot on a representative, manageable area shows whether the polish, pad and machine reduce the target defect enough and leave an acceptable finish. Mark the boundary with masking tape. Start with a mild combination that can reasonably provide enough cut. If the defect stays unchanged, alter just one variable at a time: polish, pad or technique.
With a polish that has no built-in protection, wipe off the residue and inspect the result using a panel wipe suitable for the material. Visible holograms mean more finishing is needed. With a polish that includes protection, remove the residue as directed; degreasing as a matter of course would work against the intended protection. Plan for this difference before the test spot.
A single-stage approach with Koch-Chemie One Cut & Finish "P6.02" can make sense for moderate defects when your target and the paint's response line up. It does not guarantee that every paint can be finished in one stage. A two-stage process separates cutting from finishing: heavy or medium correction first, followed by Micro Cut. It adds a second stage and gives you more control over each task.
Set a stopping point before tackling the full surface. Removing every scratch is not a paint-preserving target when some defects are too deep to correct safely. A realistic target might be an even finish with no visible holograms under inspection light, a clear reduction in wash-induced swirls and a deliberate decision to leave deeper individual scratches. That target helps you avoid unnecessary extra polishing.
Note the combination, pad size, machine type, working section and number of passes. Paint can differ from panel to panel; a test spot on the bonnet is no green light for repainted wings. Repeat the check if the paint responds differently or the finish changes.
The pad transfers the machine's movement to the paint. Together with the polish, machine type and technique, it determines how much correction and how fine a finish you get. Hardness, cell structure, height, material, diameter and condition affect both cut and finish. The six foam pad lines from the 2024 system described here are 25 mm high and colour-coded; that specification does not apply to every specialist pad.
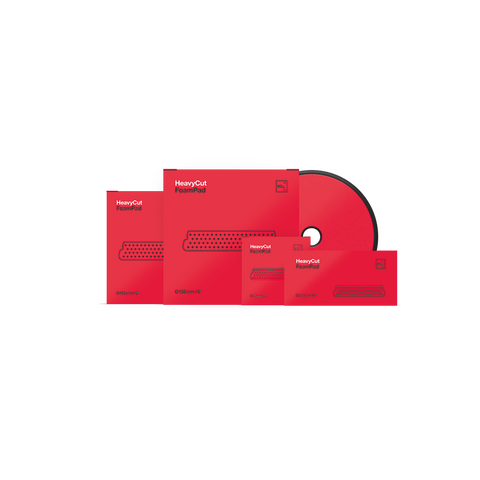
The colour coding is red for Heavy Cut, as with the Koch-Chemie Heavy Cut Foam Pad "Rot" (2024), yellow for Fine Cut, orange for One Cut, violet for Micro Cut and green for finishing or applying protection. The Koch-Chemie Micro Cut Soft Foam Pad "Violett" (Weich) (2024) is a soft pad for Micro Cut.
Find the full choice of sizes and stages in Koch-Chemie polishing pads. The pad must cover the backing plate properly and be mounted centrally. Large pads work efficiently on open panels; smaller sizes reach pillars, mirror caps and intricate bumpers. Do not force a large pad around tight contours.
A rotary delivers direct cut but needs close control of heat, edges and finish. A free-spinning dual-action machine reduces the risk of uniform rotary marks, though its rotation can stall on pronounced contours. A forced-rotation dual-action machine combines an orbital motion with driven rotation. Choose the machine according to the polish manufacturer's instructions and your ability to handle it safely, not a general promise of more power.
Keep the pad and paint clean. Only brush or blow out a pad with suitable equipment, technique and protective gear. Swap it when it becomes saturated, hot or loses its structure. A pad loaded with Heavy Cut and removed paint does not belong in the finishing stage. Even different polishes with the same colour coding need separate, labelled pads; do not alternate products on a pad dedicated to one polish.
Keep the machine flat, move at a controlled pace and use overlapping crosshatch passes. Set pressure, speed and working time from the product instructions and test spot. Ease off at edges. End the pass at the intended point; do not run polish dry trying to squeeze out an imagined last bit of cut.
After each section, remove polish residue with a suitable microfibre towel and inspect the finish in a way that suits the polish and its protective content. Fold the towel and switch faces before it becomes saturated. Heavy wiping pressure can put fresh marks into sensitive, newly polished paint. Clean edges and gaps carefully so white residue does not dry in place.
For an honest view of the finish, see the Koch-Chemie silicone removers & degreasers collection. Koch-Chemie Panel Preparation Spray "Pps" is ready-to-use and removes oils, waxes and polish residue from solvent-resistant surfaces. Koch-Chemie Silicon- & Wachsentferner "Sil" also removes residue from suitable solvent-resistant surfaces. Both need a material compatibility test and clean towels. Do not routinely use them after a polish whose built-in protection you want to keep.
Inspect under direct light, raking light and from different angles. Dark paint shows haze particularly clearly, yet light paint also needs directional inspection lighting. Check transitions between sections and edges as well as the middle of the panel. Even gloss without visible transitions tells you more than a view from just one position.
Finish and paint protection are separate decisions. Products such as P3.01 and P6.02 contain care or protective components; others, including M3.02, offer a more neutral correction route when a separate coating is planned afterwards. Your choice of formula therefore needs to account for the next step from the start.
Before applying separate protection, follow its own preparation instructions. Keep freshly polished paint free from renewed contamination through hand contact, dust or unsuitable detailers. There is no universal waiting time for every system. Product instructions, conditions and a completely residue-free surface are what count.
PMMA headlights need a separate polishing process because transparent plastic has different requirements from paint for product choice, work stages and temperature control. Koch-Chemie Headlight Polish 1 "Hlp1" corrects severe weathering; Koch-Chemie Headlight Polish 2 "Hlp2" produces high gloss and a sealing effect. The Koch-Chemie headlight polish collection explains sanding stages, pads, temperature control and legal limits. Do not assume a paint polish is suitable for transparent plastic lenses.
Metal and chrome also need a separate material check. Koch-Chemie Metal Polish "Mep" is applied by hand and is expressly unsuitable for aluminium or anodised trim. A wheel, trim strip or exhaust tip cannot be assessed by its silver colour alone. Identify the coating and base material before choosing the product.
Build your shopping list around the proven test spot: the right polishing stage, clean pads and suitable spare pads for changes due to dirt, saturation or heat, several removal and inspection towels, masking tape, lighting and a suitable panel wipe if needed. Add clay and lubricant only where bonded contamination is present. Specialist products belong in the kit only for the relevant materials.
Plan how you will organise the work, too. Keep clean and used pads apart, label each polish-and-pad pairing and have an unused towel face ready for every finishing section. Do not move a pad from a heavily weathered lower door straight onto a sensitive gloss pillar without checking it. Divide the car into roof, bonnet and boot, sides, bumpers and details so you can record temperature, pad changes and results. After a break, you will know which sections have been checked and which still carry polishing oils or residue.
Planning your time helps preserve the paint, too. A full correction does not have to become one uncontrolled marathon. If lighting, temperature or concentration deteriorate, a properly managed pause beats a rushed finish. Wipe off residue, separate used pads, note your progress and check the surface for dust again before restarting. That keeps the test spot a reliable reference, rather than a vague memory from the start of the day.
Prioritise complete, technically coherent processes. The 2024 pad system alongside H9.02, F6.01, M3.02, P6.02 and Pps provides clear reference points for different correction goals; the actual choice still comes down to the paint and test spot. Check variants and delivery details on each product page instead of letting a fleeting stock display dictate the technical approach.
That makes choosing Koch-Chemie polishing products a process decision rather than guesswork. Start with a clean surface and a measurable target, not the strongest bottle. Test polish, pad and machine together, inspect the result in a way that suits the polish, and plan protection deliberately. This order reduces wrong purchases, needless paint removal and unexpected holograms, without promising a result the individual paint cannot support.
Too much choice in Polishing & paint correction by Koch-Chemie? Get help picking:
The PolishSystem pairs matched polishes and pads for heavy correction, moderate defects and fine finishing. Machine, technique and paint condition all shape the result. Complete paint correction also includes cleaning as needed, defect inspection and a test spot. The protection that follows depends on your chosen polish.
Wash the paint and remove remaining contamination as needed; clay needs suitable lubrication. Check defects and the remaining paint before trying a mild polish-and-pad combination on a test spot. Follow the product instructions and inspect the finish. Do not routinely degrease if you want to keep the polish's built-in protection.
Heavy Cut handles heavy correction, Fine Cut moderate defects, and Micro Cut fine polishing marks and finishing. One Cut combines correction and finishing with a sealing effect. The right stage depends on the defects, remaining paint and your target. A test spot shows whether you need one stage or several.
Do not assume so. Headlights made from PMMA, polymethyl methacrylate or acrylic, need a dedicated process. With metal, identify both the base material and coating. Koch-Chemie Metal Polish "Mep", for example, is unsuitable for aluminium or anodised trim. Each product's approved materials and instructions decide suitability, not how similar the surfaces look.
A used pad can carry polish residue and removed material into the next stage. For the relevant polishes, Koch-Chemie therefore specifies that used pads must not be alternated with other products. Keep separate, labelled pads ready and change them when they become saturated, hot or lose their structure.
Do not set a fixed calendar. Whether abrasive polishing makes sense depends on the defects, your target and the paint available to work with. Inspect the clean paint and test the mildest suitable combination. If the finish already meets your needs, that gives you no reason for another pass that removes material.
Daniel von Detailing1 |

Daniel von Detailing1 |

Jasper von Detailing1 |

Daniel von Detailing1 |

Daniel von Detailing1 |

Daniel von Detailing1 |

Jasper von Detailing1 |

Jasper von Detailing1 |

Daniel von Detailing1 |

Daniel von Detailing1 |

Daniel von Detailing1 |

Daniel von Detailing1 |